# Tables
This menu option allows you to add tables that will be in each product sale unit (3). The main window of this function shows the consumer center areas (4).
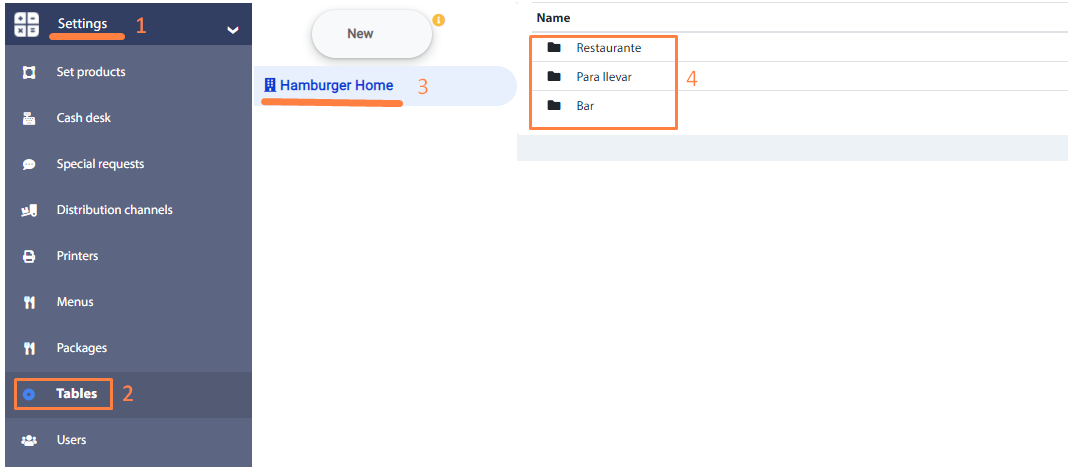
# Consumer center
A consumer center area can be added as follows:
- Click on the product sales unit
- Click on the button New and then Add point of sale.
- In the pop-up window, enter the name of the consumer center and press the Accept. button.
Recommendation
The Consume center to go option applies only to centers of consumption that do not require physical tables, and refers to the customer's products will be to go. There must be only one type of take-away center and only one table Take-away, even if it is not a physical table.
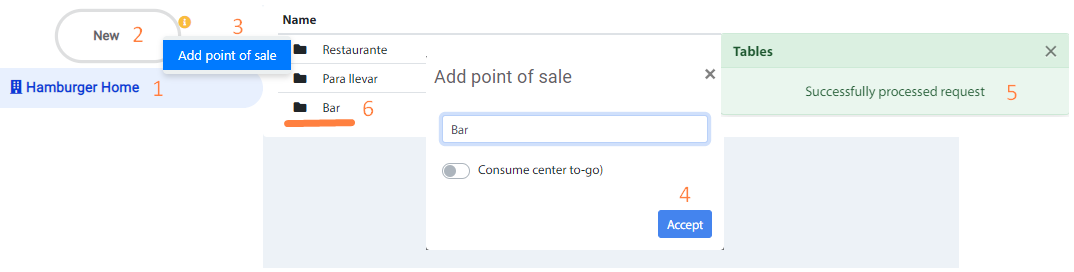
Also, it is possible to change the name and delete a consumption center, by right clicking on the registration and choose the corresponding option in the menu.
# Tables per consumer center
By double clicking on the center of consumption area, the registered tables will be shown (1), and it is possible to add other tables by clicking on the button "New " and choosing the option "Add table". In the pop-up screen, by default, the center of consumption in which you are navigating is selected, however, it is possible to change it with other available options. Click on the Accept button.
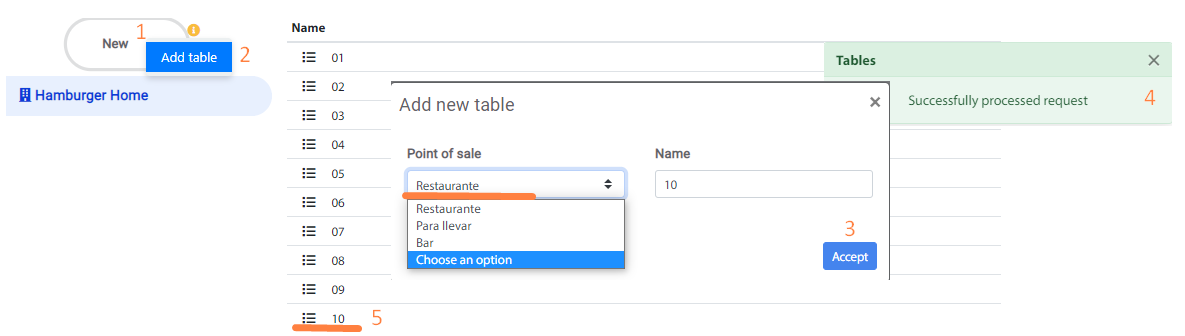
To change the name and remove a table from a center of consumption, right click on the registration and choose the corresponding option in the menu.
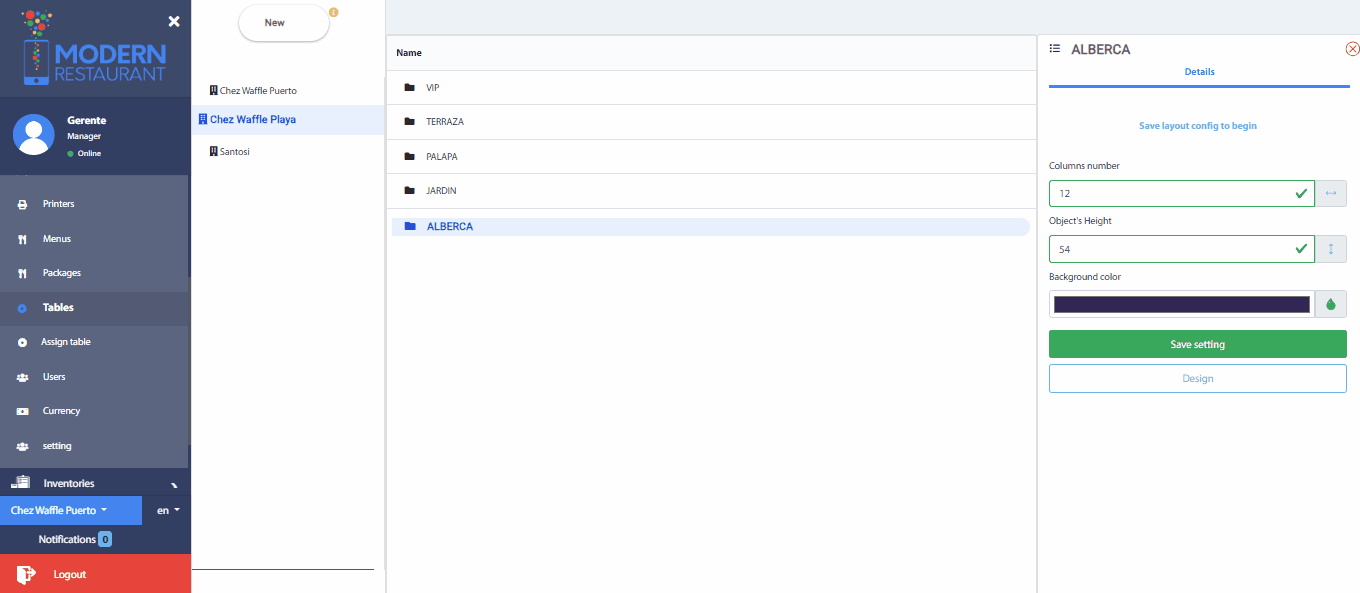
# Design of Cost Center Area
To start designing, select an option from the consumption center area.
Upon selecting the area, an option will open on the right side of the screen showing the necessary configuration fields for the design. The available fields are:
- Number of columns: Set the number of columns you want for the design.
- Object height: Specify the height of the objects within the design.
- Background color: Select the background color for the cost center design.
Important
- The number of columns must be an integer between 6 and 40.
- The height of the objects must be an integer between 50 and 150.
Enter the desired configurations in the provided fields. These configurations will determine the appearance and layout of the cost center.
Recommendation
- Save Configurations: If the "Design" button is disabled, you must first save the entered configurations. Make sure all required fields are completed and save the configurations.
- Enable the Design Button: Once the configurations have been saved correctly, the "Design" button will be enabled. Click this button to proceed with designing the cost center.
When clicking the Design button, a window will open to design the cost center area. In this window, the following are displayed:
- Tables: At the top of the colored area, the available tables for the design are displayed.
- Input Fields: On the right side of the window, there are fields to add Name (obstacles) and Tables.
- Adjust Size and Position: Below, there is an option to adjust the size and move the position of the tables and obstacles.
To design the area:
- Enter Obstacles: If there are obstacles in the design area, add them.
- Drag Tables: Add tables if necessary and drag the tables within the colored area to place them in the desired arrangement.
- Delete Tables and Obstacles: You can delete tables and obstacles as needed.
- Save the Design: When finished with the design, click the Save button to record the changes made.
Recommendation
- Save the Design: Make sure to save the design after making the necessary adjustments.
- Modify the Design: If you re-enter to modify the design and delete all tables and obstacles, the saved design will be automatically deleted.